Precision Tolerances for Spherical Lenses
Mar. 29, 2022
Diameter Tolerance
All of our spherical lenses, regardless of size, are now held to a diameter tolerance of +0.000/-0.025mm. Maintaining the diameter within 25µm ensures the lenses will seat and align accurately within a well-designed barrel, aligning the optical axis of the lens with the mechanical axis of the assembly.
Diameter tolerance is a critical mechanical tolerance that must be considered when mounting an optic. Deviations from the nominal diameter may prevent lenses from seating properly in their mounting fixture, leading to decenter or tilt within the optical assembly. The image below shows a lens that is not securely held inside of a barrel due to diameter error:
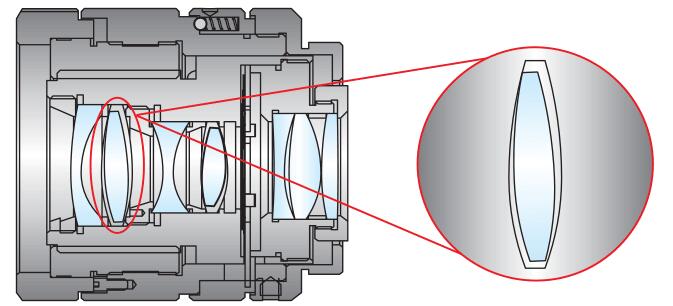
Figure 1: Effects of Diameter Error
Centration:
All of our singlet lenses with a focal length >10mm now feature a centration of <1 arcminute. This precision alignment of the optical axis ensures the lenses can be used in demanding imaging applications. When combined with the precision diameter tolerances mentioned above, this reduced wedge specification implements minimal image runout in an optical assembly. The image below shows an image runout caused by centration errors:
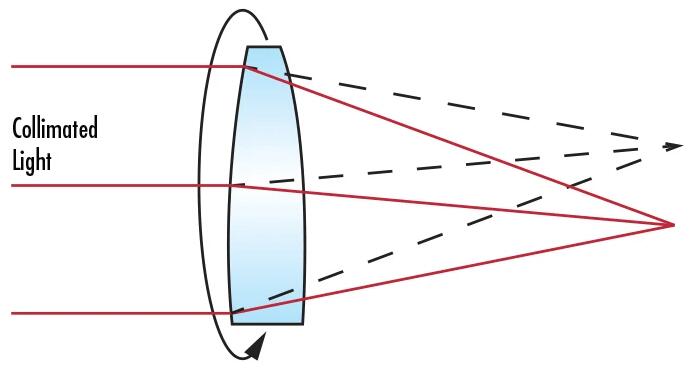
Figure 2: Effects of Centration Errors
Surface Quality:
All of our spherical lenses, regardless of size, are now held to a scratch-dig value of 40-20. This precision cosmetic specification ensures the lenses can be used in demanding laser-based systems. Even minor scratches or pits on the optical surface can lead to scattered light, which can be detrimental in laser-enabled applications.
Surface quality also impacts the laser damage threshold of a lens. Lenses with poor surface quality may fail when subject to moderate laser power or fluence. Scratches and digs in a lens could also cause laser light to scatter back and forth, destroying the coating.
View our Anti-Reflection (AR) Coatings application note for a full list of recommended energy limits for our standard Broadband Anti-Reflection Coatings.
| Spherical Lens Manufacturing Specifications | |||
| Commercial | Precision | High Precision | |
| Diameter | 4 – 200mm | 4 – 200mm | 4 – 200mm |
| Diameter Tolerance | +0/-0.100mm | +0/-0.025mm | +0/-0.010mm |
| Thickness | ±0.100mm | ±0.050mm | ±0.010mm |
| Surface Sag | ±0.050mm | ±0.025mm | ±0.010mm |
| Clear Aperture | 80% | 90% | 90% |
| Radius | ±0.3% | ±0.1% | Fix to Test Plate |
| Power (P - V) | 3.0λ | 1.5λ | λ/2 |
| Irregularity (P - V) | 1.0λ | λ/4 | λ/20 |
| Centering (Beam Deviation) | 3 arcmin | 1 arcmin | 0.5 arcmin |
| Bevel (Face width @45 degrees) | <1.0mm | <0.5mm | <0.25mm |
| Surface Quality | 80-50 | 40-20 | 10-5 |


